People are talking about retiring your sidebar which has been with almost blogs for years. Actually, sidebar can still play a good part in your website, especially if you are selling things online or even in your blog if you know how to manage it well. So here are steps to create and add widget to sidebar on your site.
CREATE SIDEBAR
Firstly, you need to create a sidebar by following these simple steps:
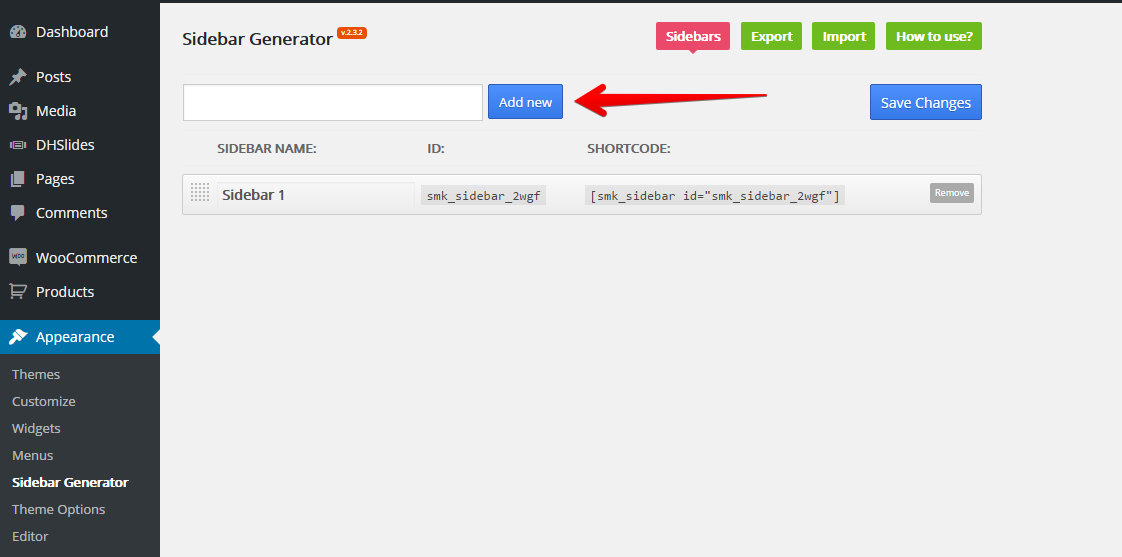
- Step 1: Navigate to Appearance→ Sidebars Generator and click the “Add New” button, give it a name and save. You can add as many sidebars as you need.
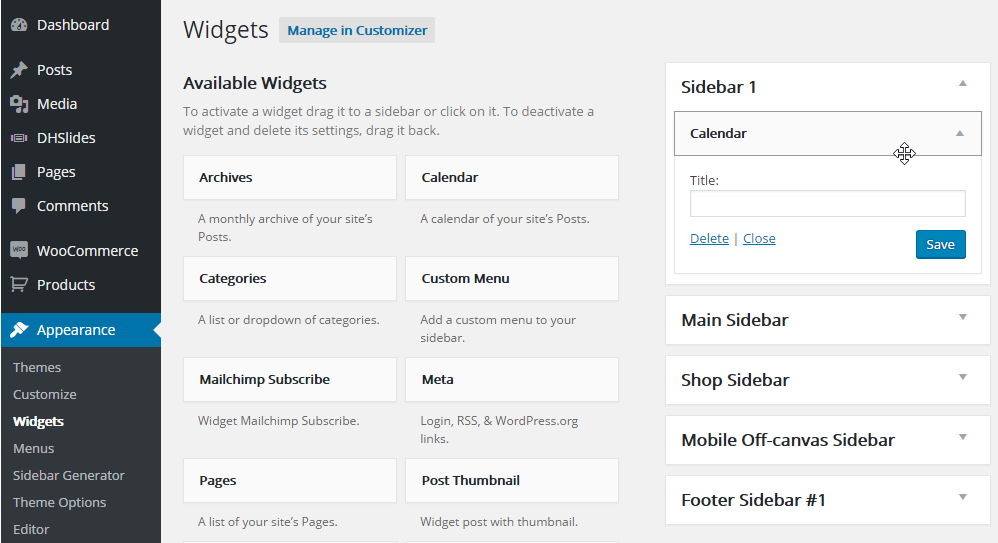
- Step 2: Once your are done, you need to add Widget to the sidebar you just created. Navigate to Appearance→ Widgets and find your sidebar on the right side.
- Step 3: On the left hand side you will see all the widgets you can use, simply drag and drop the widget you want into your sidebar on the right hand side.
- Step 4: Make sure you click Save Changes to save the widgets added to your sidebar.
ADD WIDGET TO SIDEBAR
All widgets are accessed in the Widgets section of the WordPress admin. Widgets can be added to any sidebar, footer column or sliding bar column. Widgets can even be added on pages with the Widgets on Pages plugin. There are various fields and settings to choose for each individual widget; all are self explanatory. You can put as many widgets as you want inside of a sidebar or footer/sliding bar column. Please read below for information on how to add widgets.
To add widgets, follow the steps below:
- Step 1: Navigate to Appearance→ Widgets to access the list of widgets and widget section that they can be added to. The left hand side shows all the widgets you can use. The right hand side shows all the different sections you can add widgets to.
- Step 2: Simply drag and drop the widget you want into the widget section you want on the right hand side.
- Step 3: When finished, make sure to click Save in the widget editing box to save the widgets added to your sidebar.


